Cargando el producto…
Precio de origen
$ 68.262
+ flete y aranceles — se calculan al cotizar
Compra protegida
Puerta a puerta
Aduana incluida
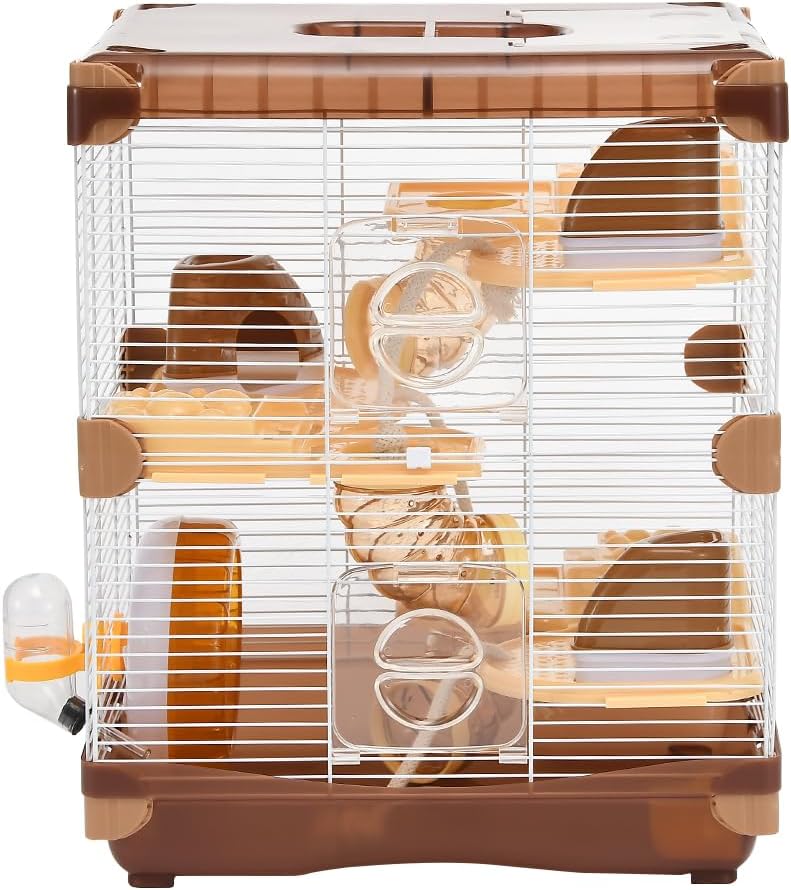
Product description Cage Details Gaming Platform *Gaming platform with numerous of perforated suface, giving fun for your hamster and training their thoughtfulness before entering the sleeping house. Tunnel *Easy observation for the movement of your hamster inside the tunnel. Functional sleeping house *Holes are located at the bottom, in order to discharge the urine and gives better airflow. *The steps are designed for hamster to climb up the roof and get their treats while meeting the daily physical activity. L-clips *Cage can be assembled easily with the use the L-clips. Rope *An excited and alternative way for crawling up to the upper deck. Inbuilt Locks *Let the meshes are connected with the base firmly. Double entries with bite-proof design A *Double entries, rooftop door and front door, are made of bite-proof plastic in order to avoid hamster from biting,hence it is value for money. Two doors make easy access to animals and more interaction with owner. Double entries with bite-proof design B *Double entries--another door. Detail size of the cage Please note below detail size before you buy this cage for your pet hamster: 1.SIZE OF THE WHOLE CAGE:14.17(W)*10.63(L)*16.73(H)INCH / 36*27*42.5CM 2.WEIGHT:1720 G 3.DIAMETER OF THE RUNNING WHEEL: 5.5 INCH / 14CM 4.DIAMETER OF THE TUNNEL:2.16 INCH / 5.5CM 5.SIZE OF THE SLEEPING HOUSE: 3*3*3 INCH / 7.6*7.6*7.6CM 6.DIAMETER OF THE DOOR OF THE SLEEPING HOUSE: 1.65 INCH / 4.2CM Installation Procedures 1. Slot the mesh along its edge into two sides of plastic clips until you hear the 'clid' sound. 2. ssemble the twelve clips and all meshes with fixing clips(A) between upper and lower mesh to fix the wire body. Hook both transparent front door onto the mesh,as shown in the diagram(B). Then slot the food bowl at either one corner notch and click the wire body into the gaps. 3. According to the diagram,assemble the transparent tunnel and ropes at the indicated positions: 4. Assemble the wheel and water bottle at indicated position. Then hook the platform on the sixth horizontal wire(count from the bottom). 5. Hook the 2nd platform on the second horizontal wire(count from the top of lower mesh). 6. Hook the 3rd platform on the tenth horizontal wire(count from the top). 7. Click in the transparent lid on the roof and insent the whole upper part into the wire body as indicated. 8. Completed. See More
Agregás al carrito
Sumás este y otros productos que querés traer.
Cotizás el envío
Calculamos flete aéreo y aranceles a Argentina.
Confirmás y pagás
Un asesor te contacta con el link de pago.
Lo recibís en casa
Tracking en tiempo real. Aduana incluida.
Los mejor puntuados del mismo tipo de producto
Mismo tipo de producto y precio parecido