Cargando el producto…

Precio desde
$ 251.506
+ flete e impuestos
Tamaño
Compra protegida
Puerta a puerta
Gestión aduanera
Tu compra, acompañada de principio a fin
Todo esto está en los Términos y Condiciones. Leerlos
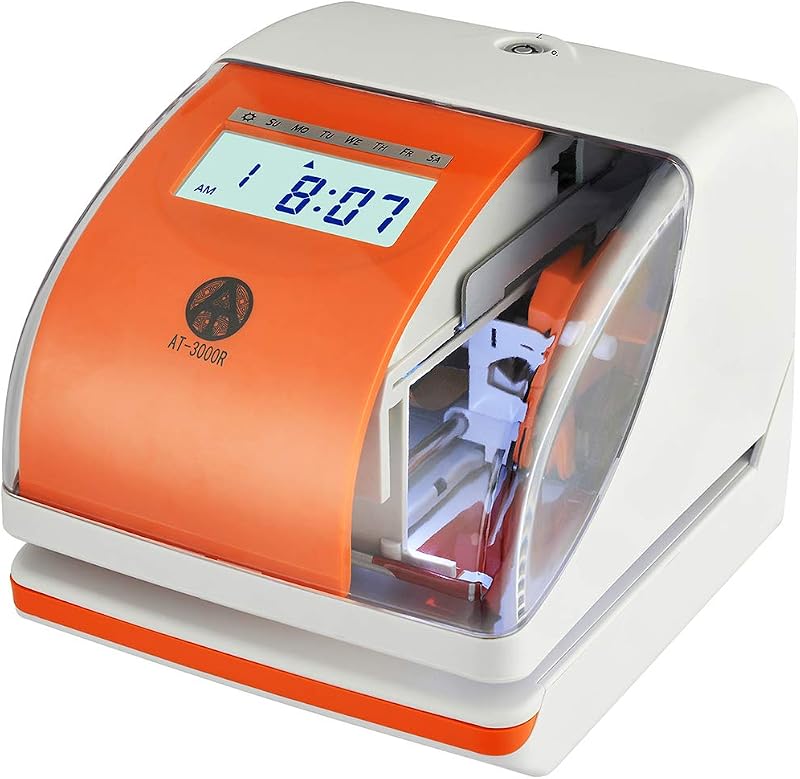
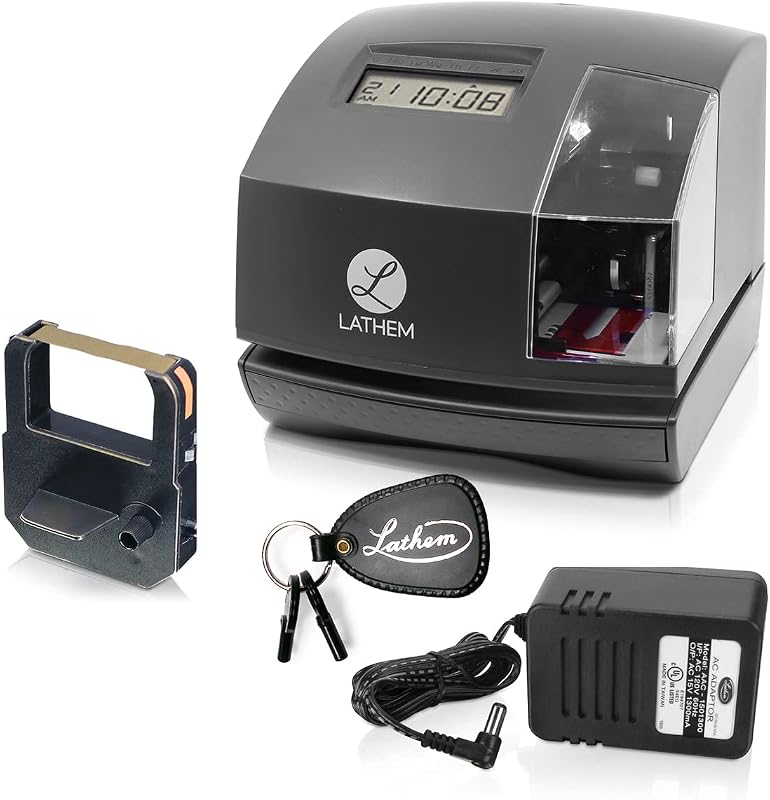
Descripción del producto Reloj de tiempo para empleados para pequeñas empresas Este reloj de tiempo electrónico para pequeñas empresas automatiza el seguimiento de la asistencia con precisión y facilidad. Compatible con tarjetas de tiempo de 7,1"×2,4" (incluidas), registra las horas de entrada/salida, descansos y almuerzos para la nómina semanal, quincenal o mensual. La máquina de entrada y salida cuenta con tecnología de alineación automática (alimenta las tarjetas automáticamente y corrige las inserciones erróneas), mientras que la impresión a dos colores (negro para puntualidad, rojo para tarde/temprano) simplifica la supervisión. El paquete de relojes de tiempo para empleados incluye todo lo necesario para la configuración: la máquina, tarjetas de tiempo, llaves de seguridad, cinta entintada e instrucciones claras. Diseñado para ofrecer confiabilidad, elimina errores manuales y agiliza la administración de la fuerza laboral. Ideal para equipos pequeños, este reloj electrónico equilibra la funcionalidad con la simplicidad y ofrece una solución sencilla para un cronometraje preciso. ¿Qué hace que nuestro reloj electrónico destaque? Registro de asistencia preciso En comparación con los registros de asistencia tradicionales de RR.HH., este reloj mantiene registros precisos de horas extras, llegadas tarde o salidas anticipadas. Función de alineación automática Nuestra máquina perforadora de tiempo puede alinear automáticamente la tarjeta de tiempo, para que los empleados puedan marcar entrada y salida rápidamente, ahorrando mucho tiempo. Pantalla grande retroiluminada Esta máquina de reloj de tiempo cuenta con una gran pantalla LED, retroiluminada para mayor claridad incluso en habitaciones oscuras. Los caracteres grandes muestran claramente la fecha, la hora y la semana. Impresión a dos colores El reloj de fichar admite la impresión a dos colores, lo que le ayuda a identificar rápidamente las marcaciones tempranas y tardías y mejora la productividad y la eficiencia. Instrucciones de inicio rápido El video muestra el producto en uso. El video lo guía a través de la configuración del producto. El video compara varios productos. El video muestra el producto desembalándolo. ¿Cómo cambiar el cartucho de cinta de tinta? ¿Cómo cambiar el cartucho de cinta de tinta? Utilice la llave para quitar la cubierta y presione el botón "atrás" para dejar que el cartucho de cinta de tinta entre en el medio. Tire de las dos partes de bloqueo hacia afuera en ambos lados de la cinta y extraiga la cinta al mismo tiempo. Luego, inserte la nueva cinta en la máquina y asegúrese de que esté colocada en el espacio entre las dos partes metálicas más internas. Instale la cubierta después de finalizar el reemplazo. ¡Ahora empieza a imprimir! El video muestra el producto en uso. El video lo guía a través de la configuración del producto. El video compara varios productos. El video muestra el producto desembalándolo. ¿Cómo configurar la fecha y la hora del reloj? ¿Cómo configurar la fecha y la hora del reloj? Utilice la tecla para quitar la cubierta y cambie la tecla 'Set-/0' hacia el lado derecho al modo de configuración. Bajo el código de configuración 00, presione el botón + & - para cambiar el valor del año y presione el botón 'Enter' para confirmar. Puede utilizar la misma manera para ingresar el código de configuración 01 para cambiar la fecha. Ingrese el código de configuración 02 para elegir el sistema de hora de 12 horas/24 horas. E ingrese el código de configuración 03 para configurar la hora. Cambie la tecla 'Set-/0' al lado izquierdo e instale la cubierta para salir del modo de configuración. El video muestra el producto en uso. El video lo guía a través de la configuración del producto. El video compara varios productos. El video muestra el producto desembalándolo. ¿Cómo configurar el modo de pago mensual? ¿Cómo configurar el modo de pago mensual? Utilice la tecla para quitar la cubierta y cambie la tecla 'Set-/0' al lado derecho al modo de configuración. Presione el botón 'Modo' y presione + y - hasta el código de configuración 05 y presione el botón 'Entrar'. Use el botón + & - para cambiar el valor de los primeros dos dígitos a '00' y presione el botón 'Entrar' para confirmar. Después de la configuración, cambie la tecla 'Set-/0' al lado izquierdo e instale la cubierta para salir del modo de configuración. Preste atención a que la fecha se muestra en la tarjeta de tiempo en el modo de pago mensual. El video muestra el producto en uso. El video lo guía a través de la configuración del producto. El video compara varios productos. El video muestra el producto desembalándolo. ¿Cómo configurar el modo de pago semanal? ¿Cómo configurar el modo de pago semanal? Use la tecla para quitar la cubierta y cambie la tecla 'Set-/0' hacia el lado derecho en el modo de configuración. Presione el botón 'Mode' y presione + y - para el código de configuración 05 y presione el botón 'Enter'. Utilice el botón + & - para cambiar el valor de los dos primeros dígitos a '01' y presione el botón 'Enter' para confirmar. Cambie la tecla 'Set-/0' al lado izquierdo e instale la cubierta para salir del modo de configuración. Tenga en cuenta que en el modo semanal solo se imprimen los días laborables y los fines de semana en la tarjeta de tiempo. El video muestra el producto en uso. El video lo guía a través de la configuración del producto. El video compara varios productos. El video muestra el producto desembalándolo. ¿Cómo configurar el modo de pago quincenal? ¿Cómo configurar el modo de pago quincenal? Utilice la tecla para quitar la cubierta y cambie la tecla 'Set-/0' al lado derecho al modo de configuración. Presione el botón 'Modo' y presione + y - hasta el código de configuración 05 y presione el botón 'Entrar'. Use el botón + & - para cambiar el valor de los primeros dos dígitos a '02' y presione el botón 'Entrar' para confirmar. Después de configurar, cambie el botón 'Establecer
Agregás al carrito
Sumás este y otros productos que querés traer.
Cotizás el envío
Calculamos flete aéreo y aranceles a Argentina.
Confirmás y pagás
Online con tarjeta, o por transferencia, con el total final a la vista.
Lo recibís en casa
Seguimiento en tiempo real. El despacho lo hacemos nosotros.
De la misma marca, empezando por lo más reseñado
Los mejor puntuados del mismo tipo de producto
Mismo tipo de producto y precio parecido




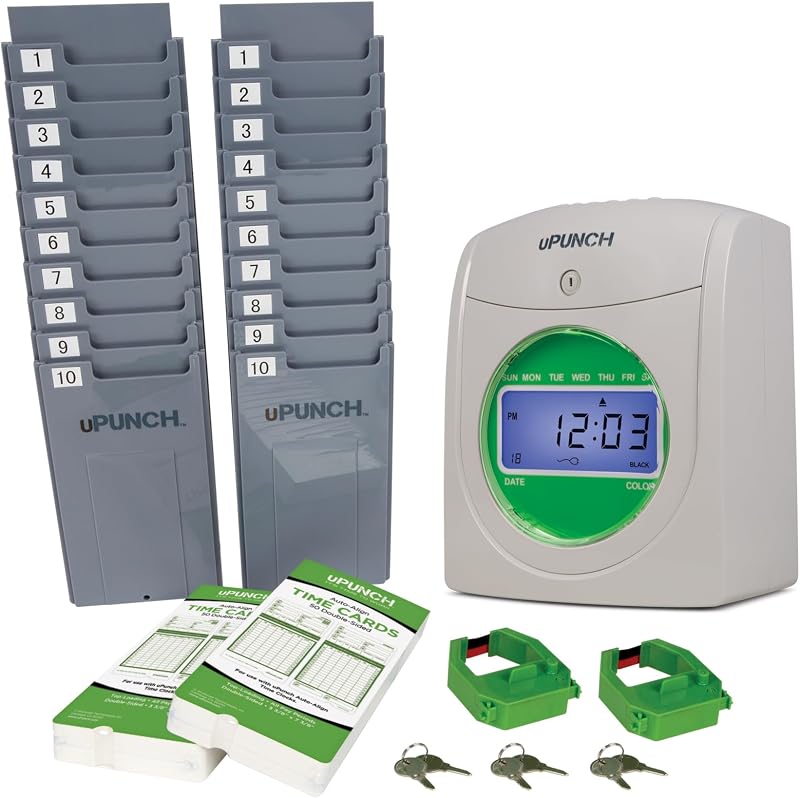

![Pyramid Time Systems - Paquete de reloj de tiempo con alineación automática 2500 [2500K1] | Reloj de tiempo para empleados, para pequeñas empresas, sistema con 100 tarjetas de tiempo, 2 cartuchos de cinta, estante de 10 ranuras y llaves de seguridad](https://m.media-amazon.com/images/I/81oLP1FtP1L._AC_SL800_.jpg)