Cargando el producto…

Precio de origen
$ 43.453
$ 78.380
+ flete e impuestos
Compra protegida
Puerta a puerta
Gestión aduanera
Tu compra, acompañada de principio a fin
Todo esto está en los Términos y Condiciones. Leerlos
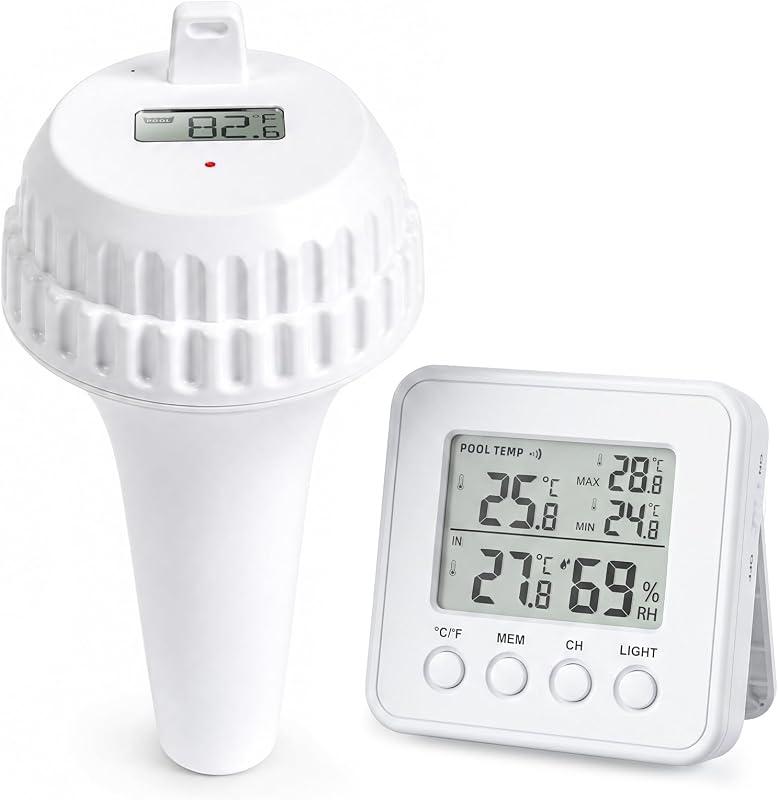
Descripción del producto Termómetro e higrómetro inalámbrico para interiores y exteriores Sonó la temperatura y la humedad: Temperatura interior: 32 ℉ ~ 140 ℉ (0 - 60 ℃); Temperatura exterior: -104 ℉ ~ 140 ℉ (-40 - 60 ℃) Precisión de medición de temperatura: ±1.8 ℉ (±1 ℃) Rango de medición de humedad: 10% a 99%; Precisión de medición de humedad: ±5% (20% a 90%) Página anterior Presione MAX/MIN una vez para temperatura y humedad máximas, dos veces para temperatura y humedad mínimas. Manténgalo presionado para borrar los registros máximos/mínimos diarios. Página siguiente Asegúrese de que la unidad principal y el transmisor compartan un canal. Mantenga presionado el botón CH en la unidad principal para iniciar la búsqueda de señal; El icono del sensor parpadeante indica recepción. El icono estable significa conexión. Los datos se actualizan cada 60 segundos. Página anterior Precisión de temperatura: ±1.8°F Precisión de humedad: ±5% Página siguiente Sugerencias de uso de la unidad principal: -Colocada al menos a 6 pies de distancia de dispositivos electrónicos. -Asegúrese de estar a menos de 328 pies de un sensor exterior. -Evitar obstáculos como paredes, ventanas, objetos metálicos grandes para minimizar la atenuación de la señal. Cómo utilizar: 1. Inserte 2 pilas AAA en el sensor inalámbrico. Tenga en cuenta la polaridad correcta. El indicador LED rojo parpadea cuando el sensor está transmitiendo. 2. Abra el compartimento de las pilas de la estación meteorológica, inserte 3 pilas AAA con la polaridad correcta y cierre el compartimento de las pilas. (Nota: la pantalla se apagará después de 10 segundos; debe presionar el botón para activarla). Reinicie la computadora central: si la estación base parece mostrar valores incorrectos, debe restablecer la estación meteorológica a la configuración de fábrica. a.Retire las baterías del sensor exterior y de la estación meteorológica. b.Coloque las baterías nuevamente en el sensor exterior y la estación meteorológica. c. Colóquelos a unos pocos pies de distancia entre sí y manténgalos durante unos 20 minutos para mantener una conexión sólida. Página anterior Página siguiente Guía de reemplazo de baterías: 1. Retire el sensor exterior y las baterías. 2. Vuelva a insertar las baterías en el sensor y la estación meteorológica. 3.Coloque ambos a unos pocos pies de distancia y déjelos reposar durante unos 20 minutos para establecer una conexión sólida. Guía de conexión de la unidad principal al transmisor (reconexión): 1. Después de instalar la batería de la estación meteorológica, intenta recibir instantáneamente la señal de emparejamiento del sensor exterior durante 3 minutos. 2. Para el emparejamiento manual, puede presionar el botón CH en la unidad base para hacer coincidir el sensor exterior correcto. 3. Durante el emparejamiento, el icono del sensor parpadea; para una conexión exitosa, el ícono se muestra fijo. 4. El host recibirá activamente durante 3 minutos cada hora hasta que la señal se adquiera exitosamente. 5. Después de que el transmisor haya cambiado a una batería nueva, también es necesario reiniciar manualmente la recepción de datos presionando y manteniendo presionado el botón CH. Consejo rápido: normalmente, el sensor exterior se sincroniza automáticamente con el host; si no, siga los pasos anteriores.
Agregás al carrito
Sumás este y otros productos que querés traer.
Cotizás el envío
Calculamos flete aéreo y aranceles a Argentina.
Confirmás y pagás
Online con tarjeta, o por transferencia, con el total final a la vista.
Lo recibís en casa
Seguimiento en tiempo real. El despacho lo hacemos nosotros.
De la misma marca, empezando por lo más reseñado
Los mejor puntuados del mismo tipo de producto
Mismo tipo de producto y precio parecido